Support
Check cable connections inside NexDock
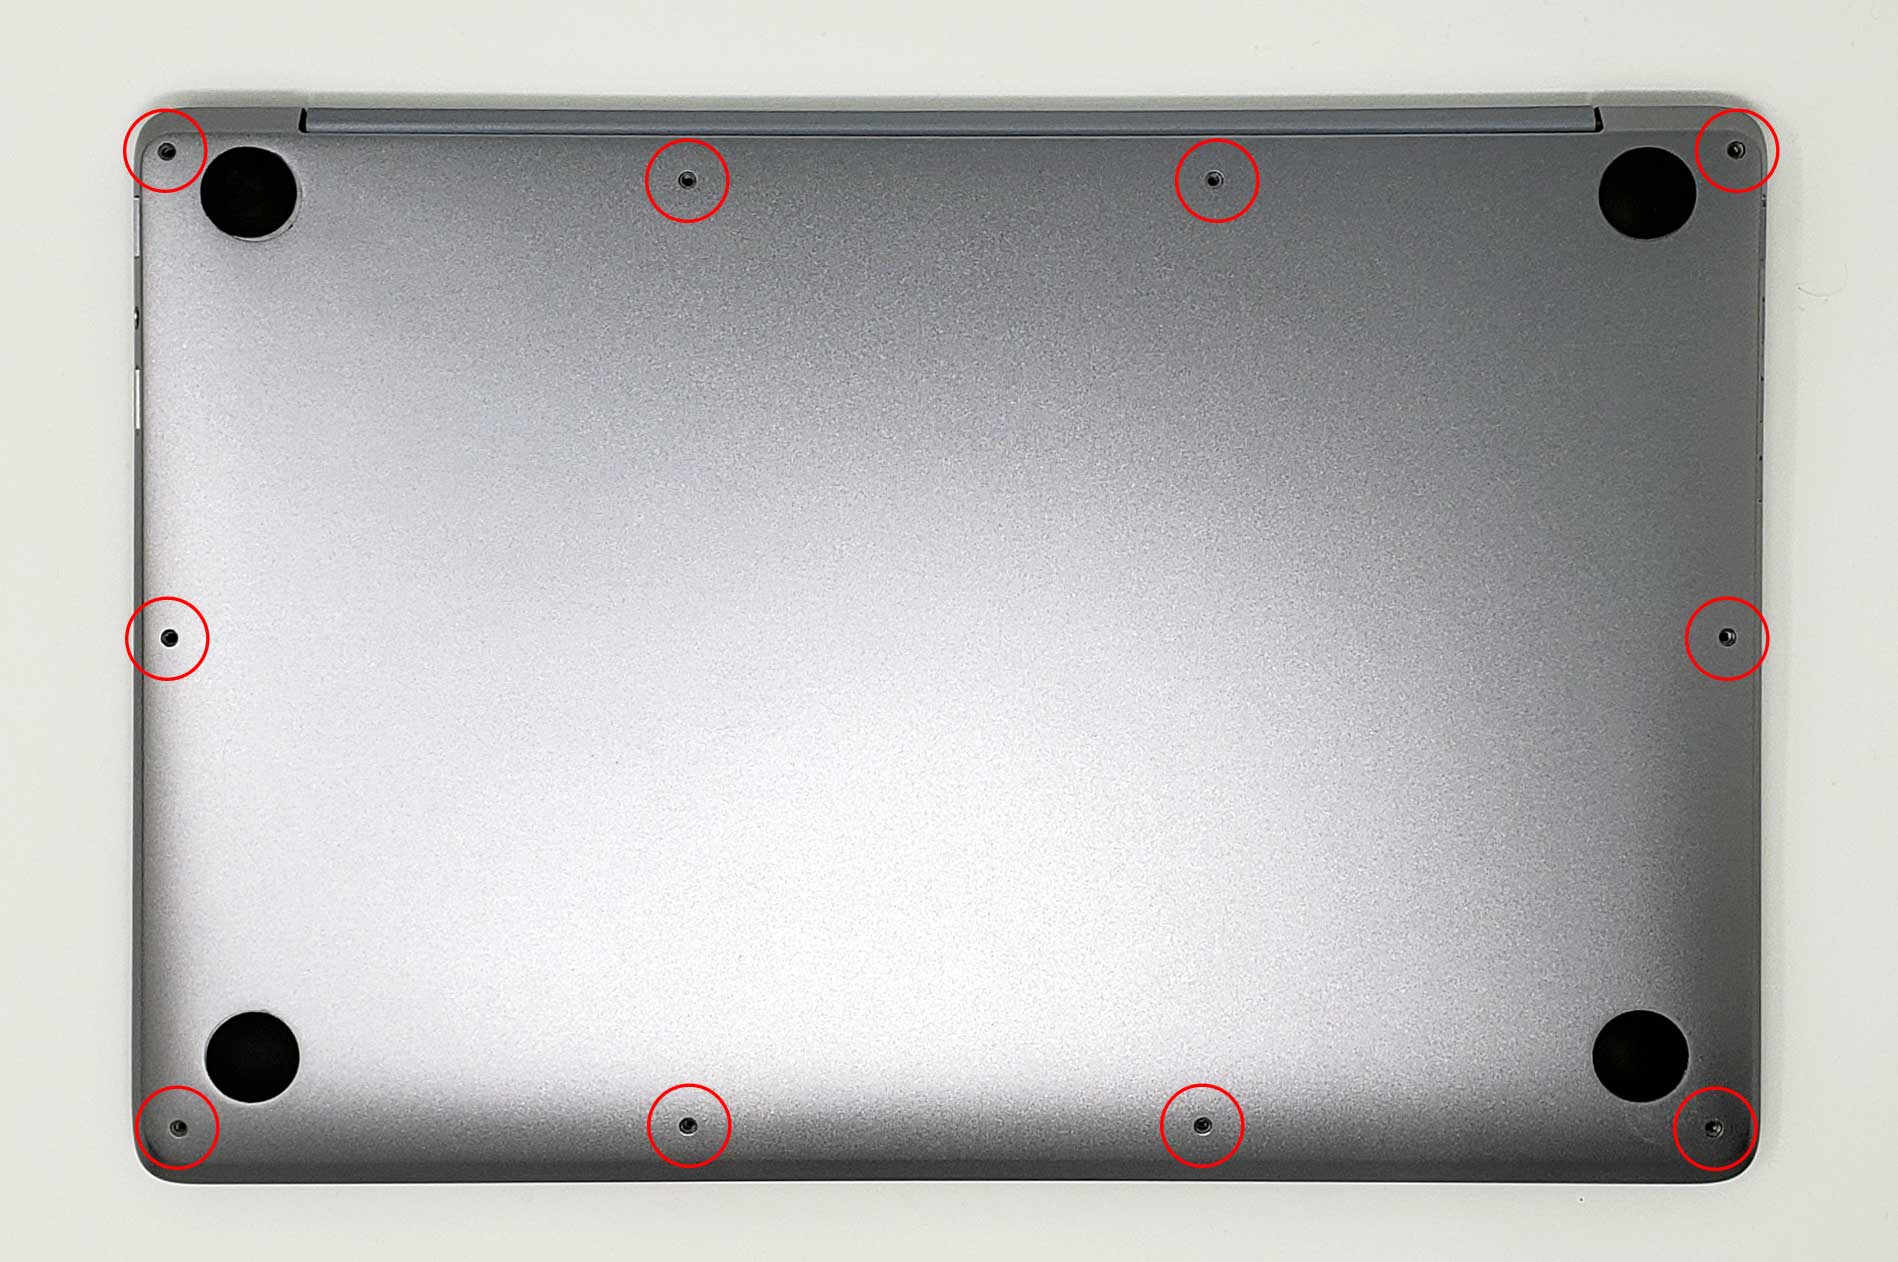
STEP 1
-
Remove the ten screws securing the lower case to the upper case.
NOTE: Throughout this repair, keep track of each screw and make sure it goes back exactly where it came from to avoid damaging your device.
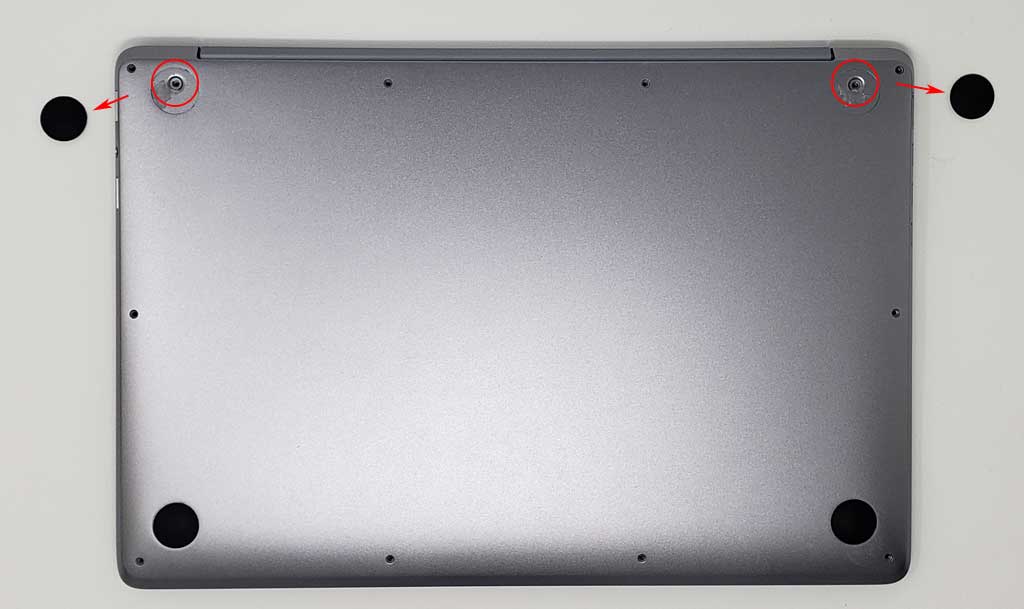
STEP 2
-
Remove 2 hidden screws located underneath the rubber grips at the back (closer to the hinge)
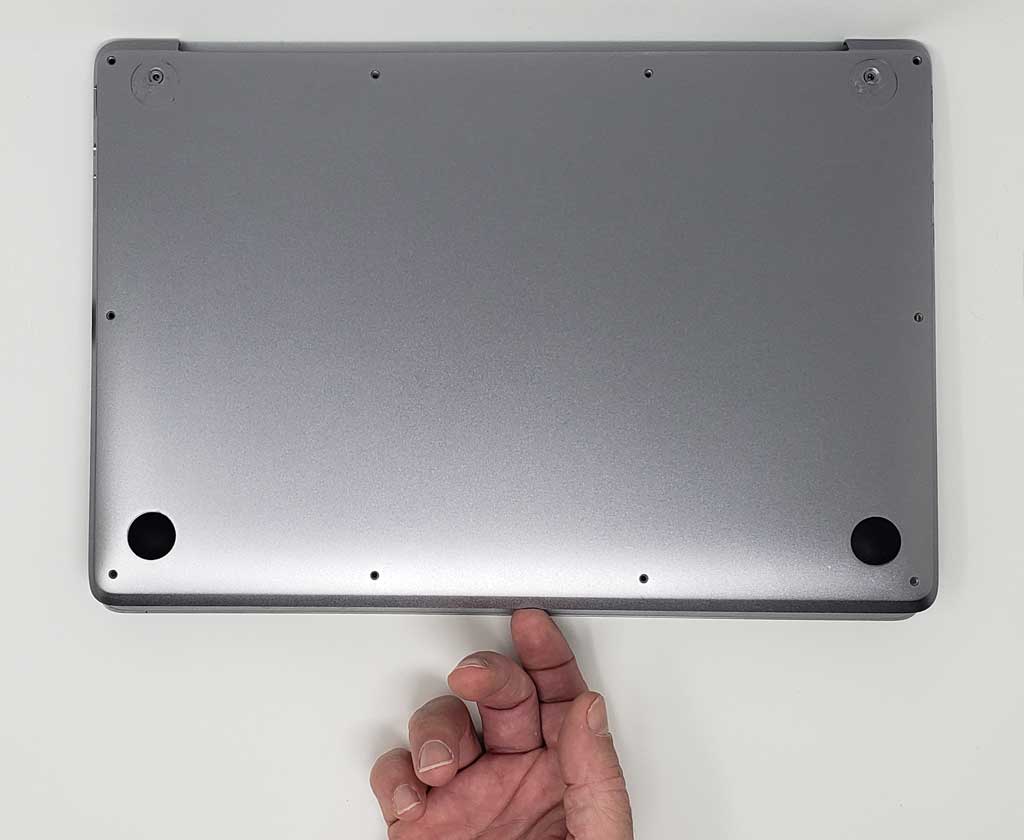
STEP 3
-
Remove the back panel by pulling up from the front edge.
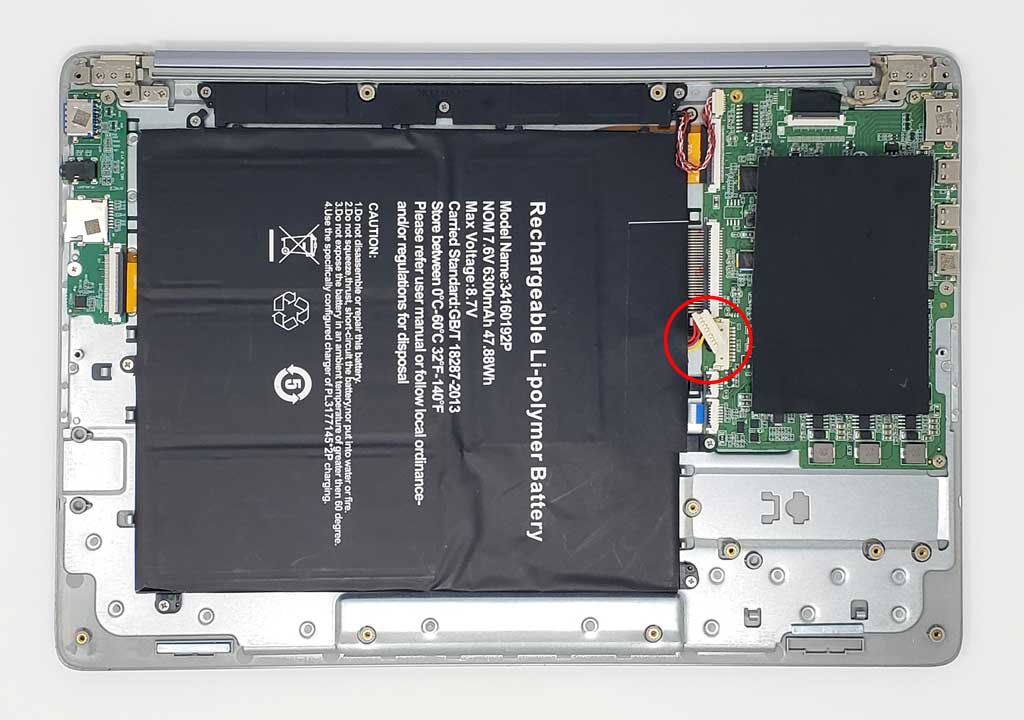
STEP 4
-
Locate the cable attaching the battery to the motherboard and gently unplug it.
NOTE: Carefully disconnect the cable parallel to the board, not at an angle. Otherwise, you could damage the port.
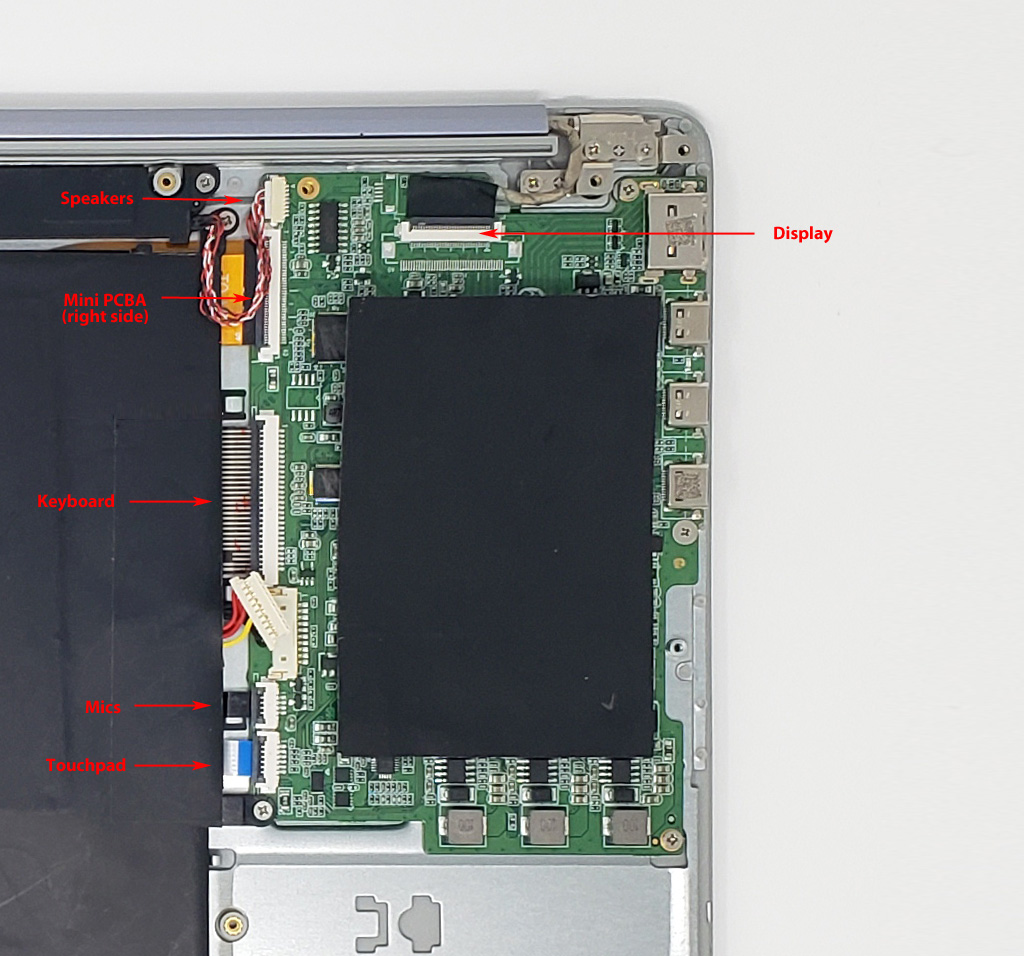
STEP 6
Locate the ribbon cable of the port you are experiencing an issue.
STEP 6
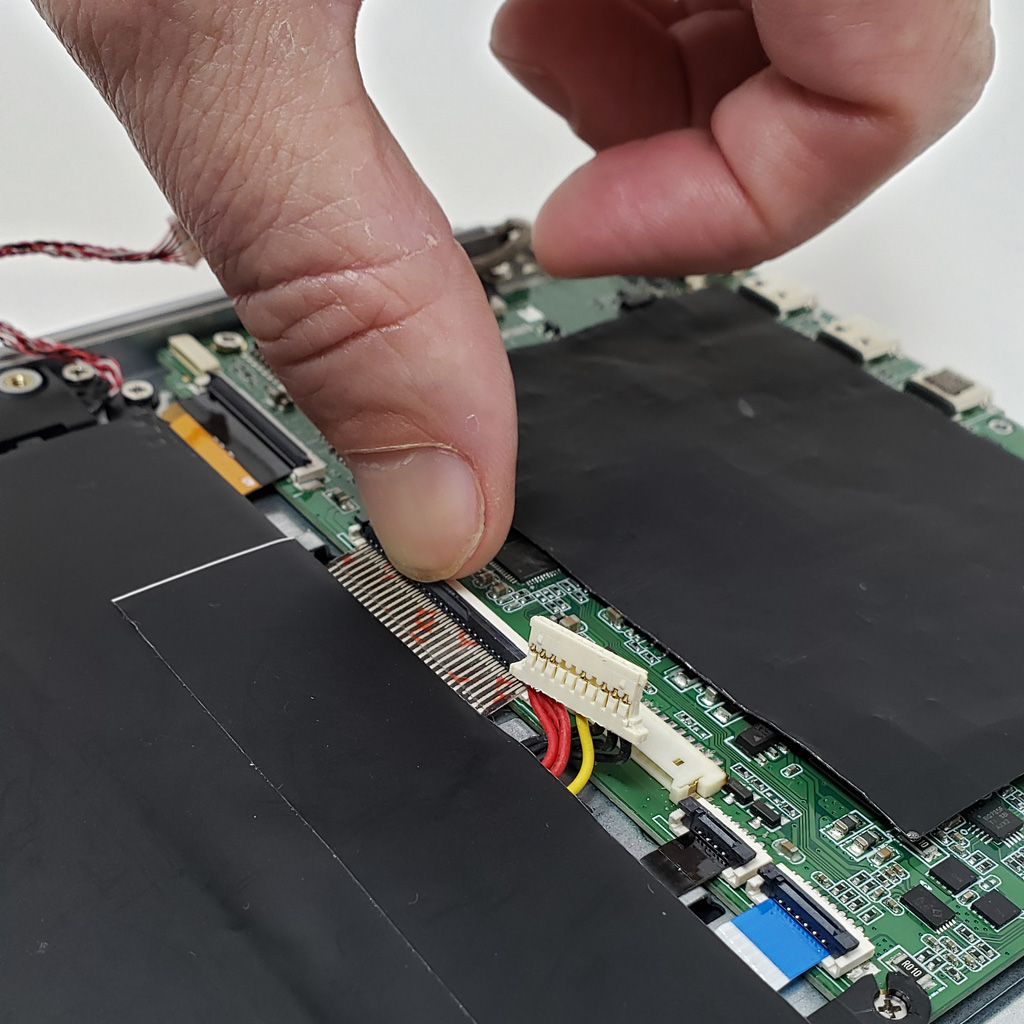
-
Unlock the latches on the ribbon cable, by sliding the hooks forward.
-
Once latches are unlocked, pull the ribbon cable out to detach it from the motherboard.
-
Push the ribbon cable back in.
-
Lock the latches on the ribbon cable.
NOTE: In case you cannot connect the cable firmly back to the motherboard remove the battery and try again.
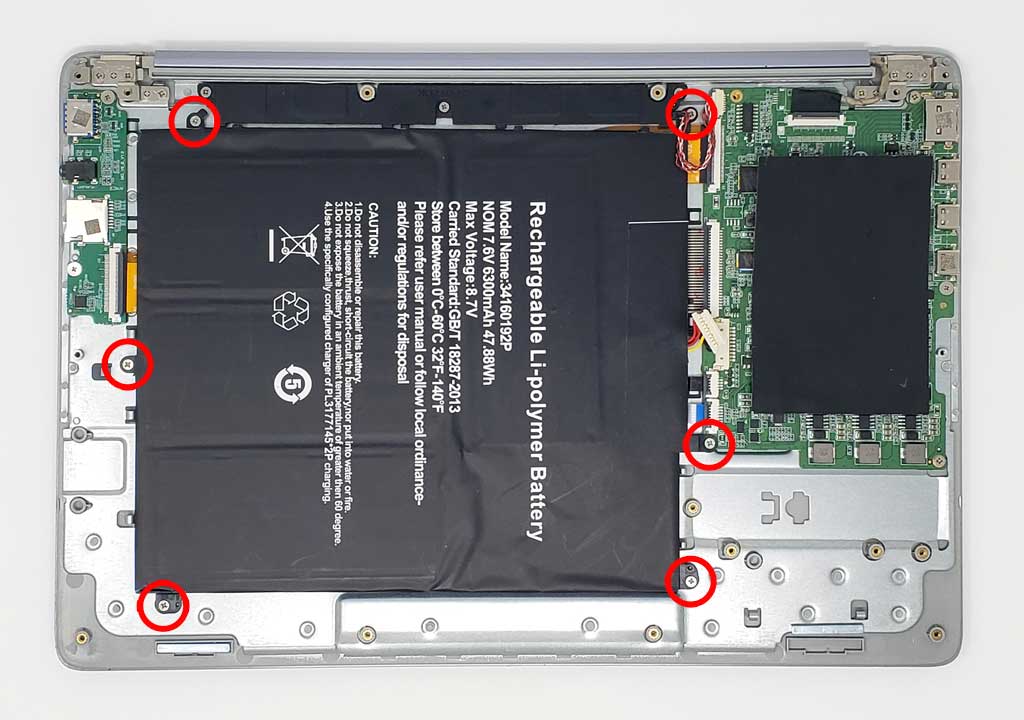
To remove the battery;
-
Remove the 6 screws securing the battery to the upper case
-
Lift the battery from its edges and remove it from the upper case.