Quick Start Guide – Raspberry Pi 4

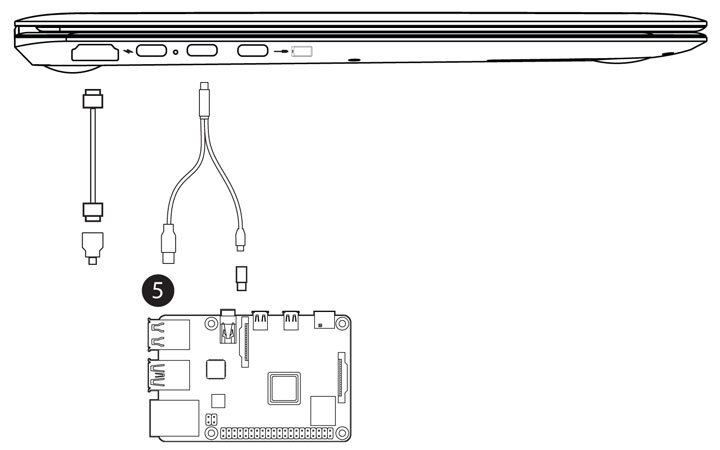
Connect one end of HDMI cable to NexDock and plug the other end into HDMI to micro-HDMI adapter.
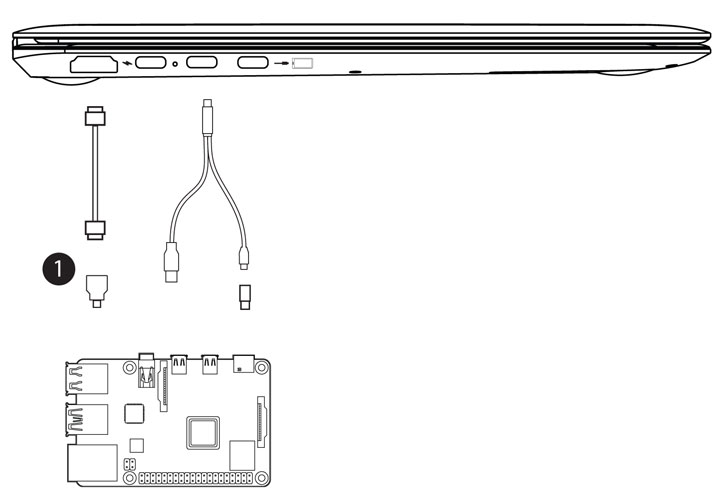

Plug micro-HDMI end of the cable to one of the micro HDMI ports of Raspberry Pi 4.
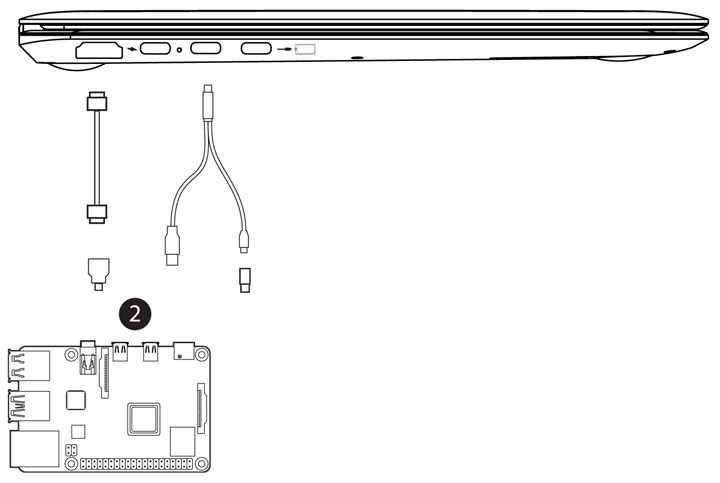

Connect USB-C splitter cable to the middle USB-C port of NexDock (Splitter cable does not work with other ports).
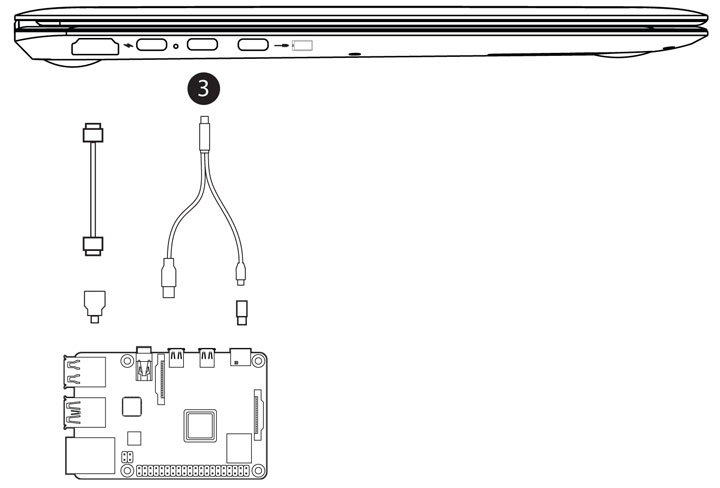

Connect micro-USB end of the splitter cable to USB-C adapter and then USB-C port of Raspberry Pi 4.
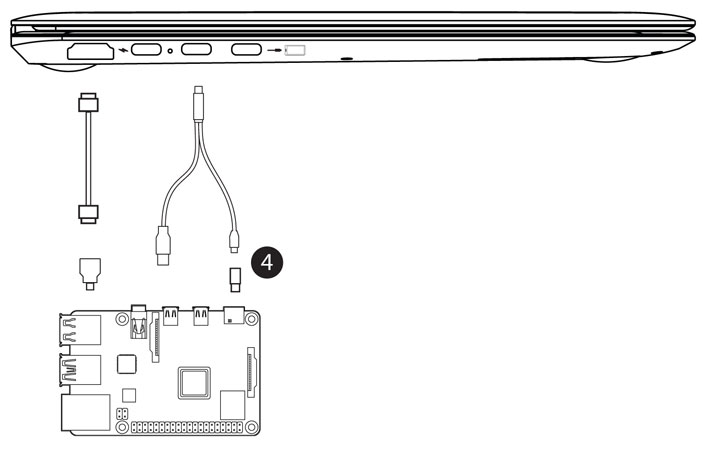

Connect USB-A end of the splitter cable to one of the USB-A ports of Raspberry Pi 4.
Turn on NexDock by pressing power button and start using your Raspberry Pi 4 as a laptop 🙂
OPTION 2
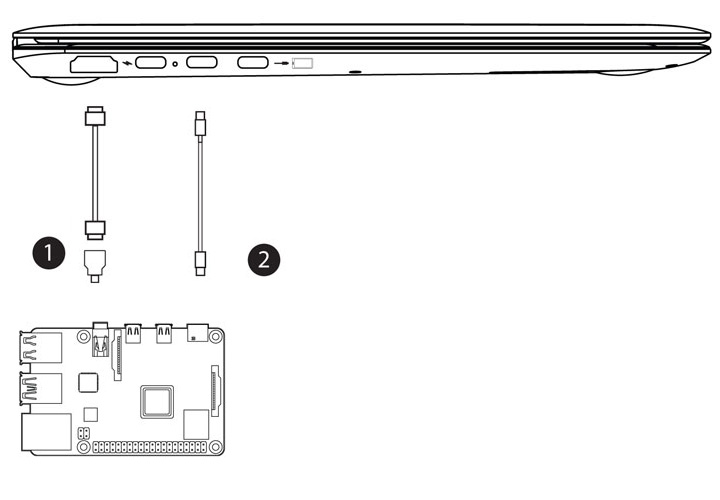
Alternatively, if you add a line of code to /boot/config.txt you can connect Raspberry Pi4 to NexDock with only 2 cables and you can use any USB-C to USB-C cable instead of Y-Splitter cable.
To do that open a terminal and enter the code below:
sudo nano /boot/config.txt
Enter below lines to the end of the file:
# USB Type-C Host
dtoverlay=dwc2,dr_mode=host
Click ctrl+O to save the file and ctrl+X to exit the terminal. Reboot your Raspbian .
Disconnect Y-Splitter cable and connect any USB-C to USB-C cable to the middle USB-C port on NexDock.
Restart your Raspberry Pi 4 and start using it as a laptop with only 2 cables.
Troubleshooting
Display Resolution
If your Raspberry Pi does not fill up your entire monitor screen on NexDock, you may need to disable overscan.
Open a terminal and enter the code below:
sudo raspi-config
When raspi-config loads, choose Advanced Options > Overscan
After that, choose NO when raspi-config ask whether you want to enable compensation for display with overscan.
Choose Ok than Finish to complete your configuration changes.
Reboot your Raspbian to see if your Raspberry Pi fill entire screen of NexDock
Sleep Mode
NexDock goes to sleep mode when HDMI signal is not detected. To prevent Pi powering off, you can switch the screensaver to “noblank” mode or switching it off entirely.
Sound
Open a terminal and enter the code below:
sudo raspi-config
When raspi-config loads, choose Advanced Options > Audio
Now you are presented with the two modes as an alternative to the default Auto option. Select a mode, press Enter and press the right arrow key to exit the options list, then select Finish to exit the configuration tool.
Reboot your Raspbian to see if sound works.
In some rare cases, it is necessary to edit config.txt to force HDMI mode. To do that open a terminal and enter the code below:
sudo nano /boot/config.txt
Erase # on the line you see #hdmi_drive=2 and click ctrl+O to save the file and ctrl+X to exit the terminal. Reboot your Raspbian to see if sound works.
Battery Charge Level
If Raspberry Pi 4 is connected to NexDock you can check the battery charge level at anytime by pressing function key and battery icon on the keyboard.
If it’s not connected, NexDock goes to sleep mode in 30 seconds and battery charge level is indicated on screen before going into sleep mode.
Please note that the new battery is only able to achieve best performance after two or three full charge and discharge cycles.
If problem persists, open a new help desk ticket by logging in to My Account and clicking on “Help Desk>Submit New Ticket” link.